You rarely come across someone who dislikes pizza. Pizza, it seems, is almost universally appealing.
 It wasn’t until last year that I realized how enjoyable the act of making pizza could be. And not only that, I discovered that it can be an exciting new canvas for creative meals, especially for those of us who must accommodate very different food preferences.
My boyfriend Max and I both love food. We love cooking together, we love to try new cuisines and we love eating. Unfortunately, the sad truth is that we are both pretty picky, and we each have a major food restriction. While he will not eat seafood, I will not eat red meat or pork. When it comes to protein, our common ground is limited to chicken and turkey. This makes variety and creativity in cooking a bit more of a challenge for us.
That’s where the pizza making comes in. Pizza turns out to be an excellent platform for differences in taste. The base – fresh dough and melted cheese – is hard not to like! So what a perfect place to start adding variety, without having to agree on what that variety entails.
I was a little overwhelmed when I first began looking for pizza dough recipes and tips. There seemed to be a million variations. Worst of all, recipes called for specialized equipment like a dough hook and a pizza stone. I certainly didn’t have anything that high-tech! Still, I decided to pull elements from different recipes, buckle down and attempt a simple version of pizza.
I learned that while a dough hook might speed up the process and a pizza stone might add crunch, neither were absolutely necessary.
Once I constructed the dough, I left it to rise for about an hour. How exciting to return and find dough that had doubled in size! Especially for the anxious cook – it shows you that you have done something right.
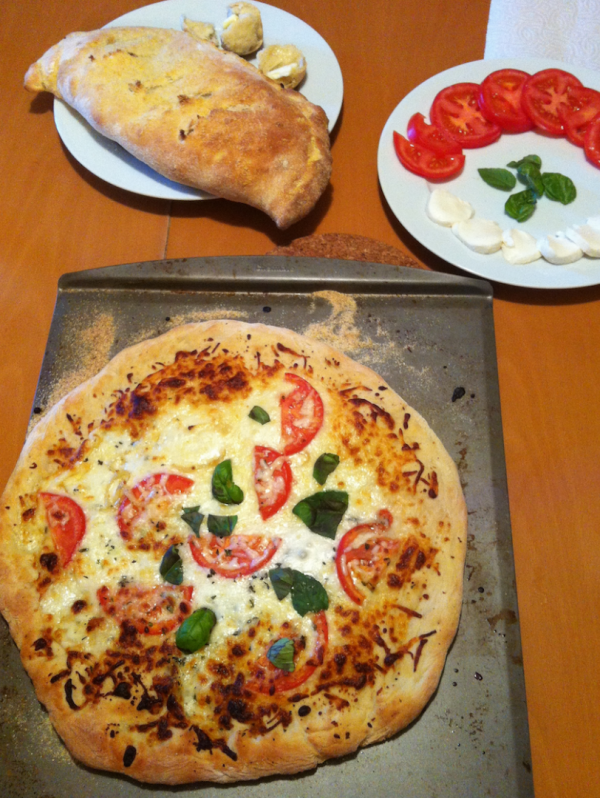
When the dough was ready to use, Max and I each made our own little pizza pie. We each had the perfect canvas to adorn as we wished – adding anything and everything that we wanted on top. (The original result was excessive cheese, in my case). My first mini-pizza was caprese style – with some fresh and shredded mozzarella cheese, tomatoes and a bit of basil. Max opted for a heavier version – with sausage, pepperoni, mozzarella and ricotta cheese.
Not only was the pizza delicious, but we also had a lot of fun crafting our own. It would be a great activity to use with children – once the base is complete, the toppings are a piece of cake pizza! Best of all, the customization options are endless. Sauce? No sauce? Meat? Veggies? Extra cheese? On the lighter side? Thin crust? Thick crust? All of these are easy to accommodate… So many possibilities!
Below is a rendition of pizza dough that Max and I have grown to love. But if you’ve taken anything away, I hope you’ll feel comfortable embracing experimentation in the art of pizza making!
Homemade Pizza Recipe
(adapted from recipes on Simply Recipes, Allrecipes, and Epicurious)*
Ingredients:
- 1 packet dry active yeast (2 ¼ teaspoons)
- 1 ½ cups warm water
- 1 teaspoon sugar (or brown sugar)
- 2 teaspoons salt
- 2 tablespoons olive oil
- 3 ½ cups flour (bread flour is often recommended, but all-purpose works as well!)
Directions:
1. Dissolve the packet of yeast in a bowl of warm water. Let it rest for about 10 minutes (you should see little bubbles/foam in the bowl).
2. Stir the sugar, oil, and salt into the yeast and water mixture.
3. Stir in most of the flour (if the dough remains sticky, then you can just go ahead and add all the flour at this time).
4. Once the mixture starts to come together, you can use your hands to continue kneading. Add the remaining flour to the dough and knead until it is no longer sticky. Bring the dough together into a ball.
5. Lightly oil a medium-large bowl, place the dough inside, and cover with a cloth. Let it rise for at least an hour (you want it to basically double in size). It helps if the dough is left in a warm place.
6. Pre-heat the oven to 450 degrees. A hot oven really helps!
7. Deflate the dough, and divide it into two smaller balls. Let it rest again for about 10 minutes.
8. Flatten, stretch, or roll the dough until it is thin enough for your liking. You can split the dough further into smaller pieces if you want to make multiple mini-pizzas.
9. Prepare the toppings you want and add them to the pizza! You might put a thin layer of olive oil on the dough before you add the toppings. **If you don’t have a pizza stone, it helps to do this part of the process on a baking sheet that is dusted with cornmeal. Otherwise, the pizza could stick to the surface and the dough could get misshapen as you try to transfer it.
10. Bake the pizza in the hot oven for about 15 minutes (the perfect length of time depends on the thickness of your crust)!
*Primarily from two recipes: Elise’s “Homemade Pizza” and “Jay’s Signature Pizza Crust”
